Showing posts with label how to. Show all posts

Friday, November 4, 2016

9 Tips to Banish Cake Face!


After a very rough month or so health wise and sleep wise, my face is in rough shape.  I did not wash and moisturize twice a day like I should have while I was sick and my skin shows it.  When your skin is dry, uneven, and full of dead skin layers, cake face is so hard to avoid!

Luckily I found a scrub and a face oil that really help! I can now actually salvage my poor skin and have my foundation apply smoothly without the dreaded cake face look.

Since I have been struggling with this and researching tips and tricks I thought I would make a post with all of the useful tips and tricks out there.  There are so many things you can do to help avoid cake face:

1. exfoliate (2-3 x's a week)
2. moisturize (2-3 x's a day)
3. add some oil to your foundation before applying (see demonstration here)
bonus tip: if you have dry skin or lots of texture to your skin avoid watery, or very thin liquid foundations. You can even put your skin type into Sephora's website and see recommendations for foundation based on your skin type)
4. apply foundation with a beauty blender or soft foundation brush
5. try to stipple (push foundation straight into your skin) instead of rubbing the foundation around your face
6. use downward strokes when applying foundation (peach fuzz generally grows downwards on your face and you want it to lay smooth and flat not stand it up)
7. make sure your foundation is completely dry before adding any finishing powder
8. press instead of rubbing powder in
9. use a glycerin, moisturizing setting spray

Thanks for reading!!  Sorry there are no pictures in this post, my camera lens is not able to pick up cakey vs. smooth makeup difference :(

post signature

Friday, January 30, 2015

Going Blonde!

In October I decided to try going BLONDE!  I found some amazing inspiration on Pinterest and decided I wanted something similar to this.

Source (original source unknown)

So I went to this awesome lady and we set out to recreate this color.  She knew I wanted to keep my hair as damage free as possible because I like to keep it long.  So when my color pulled red (due to how my hair naturally goes when it lightens and hormones due to breast feeding) we just went with what we got.

It was actually surprisingly very flattering with my skin tone and eyes.  The only problem was that sometimes it looked very blonde-ish orange instead of blonde or red or light brown.  I went in search of an awesome purple shampoo.  

Purple shampoos help blonde hair stay more cool toned and fight orange or yellow tones by leaving a touch of blue violet in your hair.  If your hair is very light blonde you need to be careful to use it once or twice a week or else your hair will start to look purple.  If that happens just don't use the purple shampoo again until it is all washed out and has started to go back to almost looking yellow or brassy.

So I choose my favorite shampoo at Sally Beauty Supply based on ingredients and smell read the review here.  I felt like it was helping, but it is a gradual change as it builds up.  A week or two after I started using it though my husband actually said that he thought the purple shampoo was actually working and that my hair was not as orange.  :)


The two left pictures were right after I had my hair done and the right picture is a few months later (obviously they are in very different lighting but my hair looks much more blonde in the right picture).

I am just about ready to go back in and we're going to have another try for more blonde and more like the inspiration, but in the meantime I have loved my new hair color.  :)

Thanks for reading!  Do you have a fun hair coloring story?  I'd love to hear about it in the comments below :)

post signature

Wednesday, January 28, 2015

Review: One 'n Only Shiny Silver Ultra Conditioning Shampoo + Conditioner

4.5 out of 5 Stars

Best uses: combating yellow or orange tones in medium to light blonde hair (it works better in lighter blonde hair).

Why I picked it:  I had heard good things about Clairol's Shimmering Lights purple shampoo, but I had also read that it smelled bad and wasn't very moisturizing and might dry out your hair a bit.  So when I went to pick it up I decided to look at a few other brands at Sally's Beauty Supply.  I liked that this one had moisturizing ingredients in it and it smelled really yummy.

What I loved:  This purple shampoo was effective, did not dry out my hair and it smelled good.  My husband even noticed that it helped my hair look "less orange."

What I didn't love:  The only complaint I have is that it isn't sulfate free.  My hair, scalp and bacne (I know that's not really a word) do better with sulfate free shampoo and conditioner.

Overall:  I would highly recommend this to anyone with blonde hair.  It will make your hair look amazing!


P.S.  I'm posting my going blonde pics and story later this week and will link it here after it posts. :)


post signature

Monday, January 26, 2015

Zit Fix! The 3 Best Spot Treatments

I have had acne off and on since I was about twelve.  Unfortunately it's been mainly "on" and very rarely "off."  I have tried so many different acne products both prescription and over the counter with little success.  There are a few products that are worth sharing though :)


If you have acne often or even if you only get a "spot" rarely, the best strategy may be just to treat each spot.  Often using a strong or drying product on your entire face will cause more harm than good.  These three use a variety of active ingredients to help you get rid of zits faster.


The first is Murad's Acne Spot Treatment.  This baby is $16 for a little tube that will last for a very long time.  It is very soothing and effective at reducing the swelling and pain of a zit while helping it heal faster.  Here are the claims straight from Sephora, "High performance ingredients, such as sulfur and salicylic acid, reduce the appearance of blemishes while supporting natural cell turnover. Zinc and licorice root extract help support natural healing. This product is dermatologist developed."  I just barely ran out of this and I will miss it.  The only downfall is that it is a little smelly due to the sulfur.


The second product is a glycolic acid acne spot treatment called the Zit Zapper from Perfectly Posh.  This is also a small tube with the same amount of product as the Murad treatment.  It also will last forever!  This acid is great for getting rid of the dead skin cell plugs and oil that causes zits, blackheads and whiteheads.  It can shrink some zits in a matter of hours!  The claim straight from Perfectly Posh "Aggressively exfoliates clogged pores to reduce duration of blemishes."


The third product is actually a mask but I liked it a lot better as a spot treatment as it was a little too drying for my entire face.  It is Proactiv's Skin Purifying Mask.  This product was great for making you feel like you were instantly shrinking and drying out your zit.  It also always made them heal up in about half the time that they would heal in without this treatment.  The mask uses sulfur, kaolin clay and tea tree oil to clarify skin and kill bacteria.  The claims from Proactiv "Containing sulfur medicine and kaolin clay, it draws out impurities, reduces excess oil, and keeps pores clear, helping prevent new breakouts. It also soothes and calms skin as it reduces redness, irritation and blotchiness."

These three have really helped me with my skin when I was desperate to fix a nasty spot or two (or three).  :)  I hope they will help you out too!

What are your favorite acne fixes?  I'd love to hear in the comments below!


post signature

Thursday, June 26, 2014

Review: Maybelline Dream Lumi Highlighting Concealer

4 out of 5 stars


Best uses:  Highlighting, concealing under eye circles while highlighting, matte finish highlight with no shimmer, sheen, glitter, etc.

Why I like it:  The wand is easy to use, it lasts a long time, it provides good coverage and a natural looking highlight, blends easily.

What I don't like:  If my skin is dry at all, this makes it look worse.

How I use it:  I like to apply it right along the lowest part of my under eye, you know that line or indent that goes from the inner corner of your eye, at an angle out and down, I put it right in that low spot and blend gently with my finger.

If I have more time then I will apply along the skin right next to the bottom of my nose, a little right down the center of the bridge of my nose, a bit on the tip of my chin and a wedge/triangle under my eye.


post signature

Wednesday, June 25, 2014

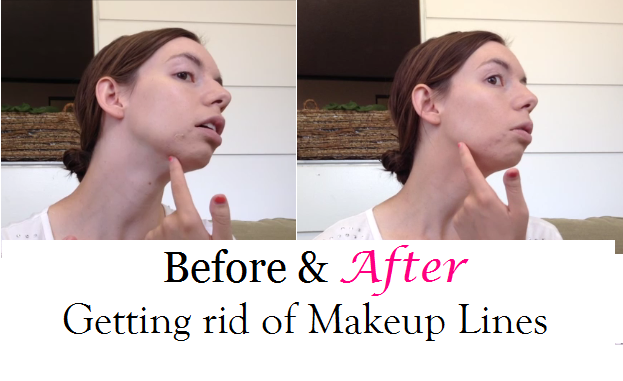
How to get rid of makeup lines

I struggle to get the right shade of foundation on the first try.  If I am way off I will see if I can exchange it.  I feel bad taking it back when it was my fault, so if there's anyway I can make it work, I keep it.

When picking a foundation, I go for the lighter shades because I know I am very fair.  I have found a slight yellow undertone looks much better on me than a slight pink or orange or cool undertone.  
I also have found that if I am having a hard time choosing between two shades, it is almost always better to pick the darker.  If the lighter shade looks like it might be lighter than your skin I wouldn't get it.  In the past when I have gotten a shade lighter than my skin, I look sickly.

If you get a shade that is close, but too dark, you won't look sickly.  You will have to do a little extra work to make the mismatch less noticeable though.
Here's what I do:
  • I apply foundation to my face
  • I take a little more foundation (not very much) and rub it from my jawline to almost halfway down my neck
  • You want this (on your neck) to be a very thin layer of foundation, so that you have a gradient between the bottom of your neck to your jawline.
  • Take bronzer and slowly build it along the sides of your neck, next to the front of your neck, but not right on the front, sweep it all the way to your collar bones
You want to be very sparing with your foundation and bronzer application to your neck.  You want to slowly build it for a natural look.

Here's a video of how I do it.


Thanks for reading!! 
post signature
P.S.  If you do like high end makeup, Sephora actually has a color matching machine that scans your face.  I have heard mixed reviews about its accuracy, but it's worth a try :)

Monday, June 23, 2014

There's a Dupe for that!

Remember those commercials for the iPhone?  The one that told you if you had an iPhone there was an app to do anything that you might ever need to do?  I bet you can hear it in your head right now..."There's an app for that."

Did you know that almost every high end makeup product has a similar, cheaper counterpart?  They call them dupes.  There are tons of them!  Go ahead, pick a high end product, and I bet, "there's a dupe for that!"

For example, the other day I saw some MAC swatches on a girl's blog.  The shade "amber lights" caught my attention.  It was gorgeous!  But it was also about $15 for one eye shadow.  Eek!  Well guess what auto populates in my Google search as I type in "MAC amber lights."   "MAC amber lights dupe."  


I can look through the swatches and find a product within my budget.  I can then read reviews on that product to confirm it's worth a try.  Then I can own a similar product for a fraction of the cost.  Yes!

From looking at the pictures..the closest (it's almost identical) shadow is from wet 'n wild.  It's in a trio called "I'm getting sunburned" and it's only $2.99.

Have fun dupe finding!  Do you know of any great dupes?  Share your finds in the comments below :)  Thanks so much for reading!!

post signature
Linking up: Makeup Monday

Friday, June 20, 2014

How to: Delicious cupcakes from box mix

I really like cake mixes :)  They're easy, and for the most part I think they're pretty yummy.  But did you know you can add different ingredients and make even yummier, more moist cakes, brownies, cupcakes and even cookies from box mixes?

I made cupcakes yesterday and I think I have perfected my cake mix recipe!  These cupcakes were soft, moist and super yummy.


So I used this both on a Betty Crocker yellow cake mix and on a Pillsbury strawberry cake mix.

Here's what you do:

  • Swap milk for water.  Whatever amount the box says to use of water, use milk instead.
  • Use butter instead of oil, or half butter half oil to equal the same total amount.
  • Add 2 Tbsp. Greek Yogurt or sour cream
Bake per box instructions.  Voila!  Delicious cupcakes :)


Thanks for reading!!  Enjoy your treats!


post signature

Thursday, June 19, 2014

Make your cheekbones POP!

I follow Benefit cosmetics on Instagram.  They have some pretty cool marketing and their products always have the funnest names.  Yesterday they posted a tip called "the jelly doughnut."  You use illuminator around your cheekbones/apple of your cheeks and then put blush in the center of your "doughnut" and blend.


I tried it yesterday...Wow!  I have never had my cheeks look so sculpted and gorgeous.  These pics really don't do it justice.


Before (sorry it's so blurry)

Can you see the ring of shiny color on my cheek?

Ring and blush in the middle, preblend

The finished look!  I think this is easier and maybe even better than highlighting and contouring.
I used my e.l.f. all over color stick as my highlight because it is somewhat frosty.  I used my e.l.f. baked blush in rich rose to pack in the middle of my circle.  Then I blended the edges of the circle and the middle with the blush.


You've got to try it!  Thanks for reading :)

post signature

Linking up with: Fry Sauce & Grits, Makeup Monday

Monday, June 16, 2014

Summer Makeup Tutorial

    I'm trying my hand at video making again.  It was so much easier the first time!  I'm going to take the makeup kit from last week, and show you how to do my favorite summer makeup look.  It is super simple, looks very natural, but also adds some color and definition to show your natural beauty. 
 
   I did change out a few products.  My skin is extremely broken out right now, so I am using Revlon Colorstay foundation instead of my e.l.f. BB cream.  I swapped my NYC color mosaic blush out for my e.l.f. baked blush in rich rose.  I also am using my new CK one mascara that I got for my birthday and then adding just a bit of my define-a-lash to help curl my lashes.  The wand is amazing!

    So here it is!  How to get that summer glow with your makeup.  :)  No sunburn or tanning needed.


post signature

Tuesday, June 10, 2014

5 minute hairstyle: Twist it back pony tail

I made a video!  Watch it at the bottom to see how to do this hairstyle.  Super quick and it keeps all of your hair back even if you have layers.  


This is my first video, and I don't know how to get it off my ipad other than uploading it straight to youtube.  It was a lot better quality pre-upload.  Oh well...it's not terrible :)


Thanks so much for reading!! and watching!

post signature

Monday, June 2, 2014

Cold Water Nail Polish Trick

Really? I'm going to have to try this!

I saw this on Pinterest and I was both skeptical and excited.  I love having my nails done, meaning I love how they look when they are neatly painted.  

I do not like painting them.  It is a pain and I struggle with not painting all over my cuticles and skin.  I also struggle with having enough time for them to dry before I have to use my hands and dent, scuff, or ruin the polish.


So here's my test of this "hack."


This is my right hand.  I took pictures of it, because it is always sloppier.  This is before soaking in cold water for three minutes.


This is post soaking.  The nail polish is completely dry!  I touched it, rubbed it, even scratched it and it didn't budge.  The polish on my skin also didn't budge even with rubbing and scratching. :(

Next I layered on my next shade.  I like to layer colors to get new shades.  Usually it works really well for me.  So I painted another layer (after drying all the water off of my hands and nails) and tried the water trick again.


This time I pulled my fingers out after three minutes and they obviously weren't dry, so I got colder water and tried again.  It still didn't work.  I had to go about my day at this point and this is what they looked like approximately 10 minutes later...super frustrating!


So this hack kind of works.  It does not get the polish off of your hands and did not work with my OPI polish.  It worked great with my e.l.f. polish though.  

I'll keep experimenting with it and let you guys know if I figure something else out.

Thanks so much for reading!!

post signature

P.S. see this post and many others at the BeYoutiful link party :)


**Update the next time I tried this I couldn't get it to work with my e.l.f. polish on its own :(

Thursday, May 29, 2014

5 minute wavy curls!


I never have time to curl my hair anymore.  I think I have curled it twice since Jackson was born.  We had a wedding to go to on Saturday and I knew I didn't have time to curl my hair...but I really wanted to.  

So I tried just taking really big sections and curling them...and it worked!  I was able to curl all of my hair in 5 minutes!!  It was curlier earlier, but I am out of hair spray...so this is what it looked like at about 4:00 P.M. and I curled it at 8:30 A.M.


What you need:
  • a brush/pick/comb
  • hair spray (this helps a lot)
  • 1" curling iron or wand
  • clip to hold sections (optional)


How to do it:

  • pull your hair back at your crown from your temples back to the back of the top of your head
  • this section should be about the size of a quarter to a half dollar
  • wrap it around your curling iron or wand, hold it on there for about 30 seconds or until the hair on the outside feels warm
  • start gently unwraping the end, and let the rest slide off the iron into you cupped hand (don't let it fall down straight yet) hold for a few seconds as it cools, let it down, hair spray
  • put your hand under the bottom of the curl and lift it back into a coiled spring again for a few seconds while the hair spray dries then let it down and move onto your next section
  • take the section to the right or left, the hair from the front side, behind your ear and almost to the back of your head, wrap it, curl it, and hairspray as before.
  • do the opposite side the same way
  • do whatever hair is left in the back


Voilla!  Curls in 5 minutes! 

If your hair is thicker you may have to do one more section, but probably not because my side and back sections were smaller than the first one and with thicker hair you would have more in those sections.


Thanks for reading!!

post signature


I'm sharing this with...

Wednesday, May 28, 2014

Makeup Review: e.l.f. BB Cream

4.5 out of 5 stars


Best uses:  everyday natural look, medium coverage.

Why I love it:  

This has the best coverage of any BB cream I've tried.  If you have acne prone skin or other imperfections you want to cover, this is the BB cream for you.  I also love that this does not dry out my skin and lasts all day.  It has a natural, somewhat dewy finish.

How I use it:

I use about 1.5 pumps and use my fingers to apply all over my face.  If you want to you can set it with powder.


post signature


Monday, May 26, 2014

Hair Product Review: Nioxin System 2, Cleanser, Scalp Treatment, Scalp Therapy (fine hair visibly thinning)

4.5 out of 5 stars


Best uses: 

making thinning/fine hair appear thicker, helping thinning hair regrow.

Why I love it:  

After I had my little boy, I started losing a ton of hair, which is normal, but I lost it and lost it and lost it for months.  I don't think that is normal.  Whenever I pulled my hair back you could see a ton of scalp in the front :(.  I felt so ugly and bald.  Ulta had this trial kit on sale for $19.99 and a $3.50 off any purchase of $10 or more coupon, so I decided to try the full system.  It helped give the hair that I had a lot of body and within a month I had a lot less scalp showing when I pulled my hair back.  Now my hair is pretty much back to its normal self at the roots, which is amazing, because it really was so thin and noticeably patchy.

How I use it: 

I got my hair really wet, lathered the Cleanser then applied it to my scalp and massaged it around well and then rinsed.  I applied the Scalp Therapy (conditioner) from scalp to ends, massaged a bit and let it sit for about two minutes, massaged a bit more and rinsed.  After I got out of the shower and had wrung my hair out (gently) a few times, I pumped 2-3 pumps of the Scalp Treatment into my hands, rubbed them together a bit and then applied to my scalp and roots like mousse.  I concentrated more on the areas around my forehead and temples because that's where my hair thinned out the most.

I ran out of the conditioner a while ago (that always happens) and so I still use the shampoo occasionally and try to remember to use the Scalp Treatment almost every time I wash.


post signature