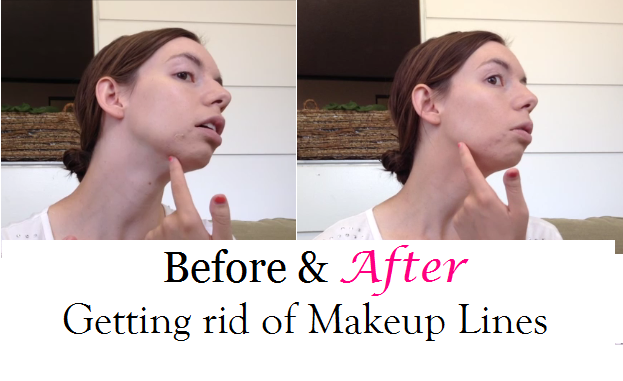
After a very rough month or so health wise and sleep wise, my face is in rough shape. I did not wash and moisturize twice a day like I should have while I was sick and my skin shows it. When your skin is dry, uneven, and full of dead skin layers, cake face is so hard to avoid!
Luckily I found a scrub and a face oil that really help! I can now actually salvage my poor skin and have my foundation apply smoothly without the dreaded cake face look.
Since I have been struggling with this and researching tips and tricks I thought I would make a post with all of the useful tips and tricks out there. There are so many things you can do to help avoid cake face:
1. exfoliate (2-3 x's a week)
2. moisturize (2-3 x's a day)
3. add some oil to your foundation before applying (see demonstration here)
bonus tip: if you have dry skin or lots of texture to your skin avoid watery, or very thin liquid foundations. You can even put your skin type into Sephora's website and see recommendations for foundation based on your skin type)
4. apply foundation with a beauty blender or soft foundation brush
5. try to stipple (push foundation straight into your skin) instead of rubbing the foundation around your face
6. use downward strokes when applying foundation (peach fuzz generally grows downwards on your face and you want it to lay smooth and flat not stand it up)
7. make sure your foundation is completely dry before adding any finishing powder
8. press instead of rubbing powder in
9. use a glycerin, moisturizing setting spray
Thanks for reading!! Sorry there are no pictures in this post, my camera lens is not able to pick up cakey vs. smooth makeup difference :(
I struggle to get the right shade of foundation on the first try. If I am way off I will see if I can exchange it. I feel bad taking it back when it was my fault, so if there's anyway I can make it work, I keep it.
When picking a foundation, I go for the lighter shades because I know I am very fair. I have found a slight yellow undertone looks much better on me than a slight pink or orange or cool undertone.
I also have found that if I am having a hard time choosing between two shades, it is almost always better to pick the darker. If the lighter shade looks like it might be lighter than your skin I wouldn't get it. In the past when I have gotten a shade lighter than my skin, I look sickly.
If you get a shade that is close, but too dark, you won't look sickly. You will have to do a little extra work to make the mismatch less noticeable though.
Here's what I do:
I apply foundation to my face
I take a little more foundation (not very much) and rub it from my jawline to almost halfway down my neck
You want this (on your neck) to be a very thin layer of foundation, so that you have a gradient between the bottom of your neck to your jawline.
Take bronzer and slowly build it along the sides of your neck, next to the front of your neck, but not right on the front, sweep it all the way to your collar bones
You want to be very sparing with your foundation and bronzer application to your neck. You want to slowly build it for a natural look.
Here's a video of how I do it.
Thanks for reading!!
P.S. If you do like high end makeup, Sephora actually has a color matching machine that scans your face. I have heard mixed reviews about its accuracy, but it's worth a try :)
I'm trying my hand at video making again. It was so much easier the first time! I'm going to take the makeup kit from last week, and show you how to do my favorite summer makeup look. It is super simple, looks very natural, but also adds some color and definition to show your natural beauty.
I did change out a few products. My skin is extremely broken out right now, so I am using Revlon Colorstay foundation instead of my e.l.f. BB cream. I swapped my NYC color mosaic blush out for my e.l.f. baked blush in rich rose. I also am using my new CK one mascara that I got for my birthday and then adding just a bit of my define-a-lash to help curl my lashes. The wand is amazing!
So here it is! How to get that summer glow with your makeup. :) No sunburn or tanning needed.
I made a video! Watch it at the bottom to see how to do this hairstyle. Super quick and it keeps all of your hair back even if you have layers.
This is my first video, and I don't know how to get it off my ipad other than uploading it straight to youtube. It was a lot better quality pre-upload. Oh well...it's not terrible :)
I never have time to curl my hair anymore. I think I have curled it twice since Jackson was born. We had a wedding to go to on Saturday and I knew I didn't have time to curl my hair...but I really wanted to.
So I tried just taking really big sections and curling them...and it worked! I was able to curl all of my hair in 5 minutes!! It was curlier earlier, but I am out of hair spray...so this is what it looked like at about 4:00 P.M. and I curled it at 8:30 A.M.
What you need:
a brush/pick/comb
hair spray (this helps a lot)
1" curling iron or wand
clip to hold sections (optional)
How to do it:
pull your hair back at your crown from your temples back to the back of the top of your head
this section should be about the size of a quarter to a half dollar
wrap it around your curling iron or wand, hold it on there for about 30 seconds or until the hair on the outside feels warm
start gently unwraping the end, and let the rest slide off the iron into you cupped hand (don't let it fall down straight yet) hold for a few seconds as it cools, let it down, hair spray
put your hand under the bottom of the curl and lift it back into a coiled spring again for a few seconds while the hair spray dries then let it down and move onto your next section
take the section to the right or left, the hair from the front side, behind your ear and almost to the back of your head, wrap it, curl it, and hairspray as before.
do the opposite side the same way
do whatever hair is left in the back
Voilla! Curls in 5 minutes!
If your hair is thicker you may have to do one more section, but probably not because my side and back sections were smaller than the first one and with thicker hair you would have more in those sections.
I've never been much of a spend-a-ton-of-time-trying-to-do-my-hair type of a girl. I always admire others' hair and think "Oh, maybe I should try harder with my hair."
I'm making it a goal to try some cute new hairstyles. I even reorganized my Pinterest boards to help me.
And the next thing I need to work on is how to take picture of my own hair...this picture is the best one that I managed to take myself. Luckily my husband helped me out with the other ones.
Yeah...I just couldn't manage to get my whole head in the picture. But I'm posting these because you can see more details close up in them.
So like I said I have been looking for inspiration. I didn't come up with this one on my own. I found it on barefootblonde.com I kinda didn't do it exactly right but I still like how it turned out.
Make sure your second braid that wraps over the top is farther back if you want it to turn out exactly how her hair does. My section was too far forward so I had to put it in front of the other braid.
Here's the video, but be sure also to check out her blog. It is amazing :)



.JPG)
.JPG)
.JPG)
.JPG)


