Tuesday, December 11, 2012

What to do with Dry Winter Skin


We all have this problem at some point during the winter.  Even if you are like me and have very oily skin, it can still get flaky and nasty as well as being oily.

Here's some changes I had to make this winter to try to get rid of those flakes.

1) Change to a less drying face wash.

I used to use this:

Avon Solutions Cleanse Complete Balance gel cleanser
It was great!  It worked well with acne and oiliness, but it also kept dry, flaky peeling away.  Unfortunately Avon stopped making it.


Then I started using this.  The Avon lady told me it was similar to the solutions cleanser.

Avon Anew Rejuvenate Revitalizing 2-in-1 Gel Cleanser
It didn't work that well for me.  I felt like it didn't do much with my acne and dried out my skin.


Now I'm using this:

Clearasil Stayclear Oil-free Daily Face Wash
So far it has done so much better with my acne and with keeping my skin from drying out.


2)  Make sure your facial moisturizer is good enough.

I love this:

Olay Complete Combination/Oily facial moisturizer with UV protection


Currently I'm trying this:

L'oreal Paris Active Daily Moisture Day lotion with SPF 15
I like it a lot too, and it seems to be working swell.


3)  Be careful with powder.

I use this:


I made it with cornstarch and a bit of cinnamon for color.  (You can use a little bit of powder make up to get color, but I was out).  It works great, but if your skin has flakes or dryness, it will only make it worse.  Also make sure you apply it very sparingly in the winter.  I apply it after my foundation has dried and I make sure I tap as much excess off of the brush as I can before I put  it (very lightly) on my face.


4)  Use this D.I.Y. treatment

You can take plain yogurt and sugar, and you'll have a great treatment for your dry flaky face.


Just take a few spoonfuls of yogurt and a spoonful or two of sugar (don't mix the two until right before you use it, the sugar will dissolve).  Then towards the end of your shower mix them together and lightly massage in circles on your face.  The sugar helps to loosen dead skin cells and dry flakes and the yogurt also helps with skin cell turnover and moisturizes.

I almost forgot....

eyes lips face Studio Makeup Mist & Set
Sprays like this can also help restore moisture to your face :)  I bought this one a few months ago and I love it.  Only $3 from e.l.f.

Monday, November 12, 2012

Nail Inspiration...who woulda thunk it?

This post is entirely about inspiration for future manicures.  None of these photos are mine.  I found as many sources as I could, but unfortunately I was not able to find all of their sources.  


Python Crackle: pshiiit.com

Hopefully these nails with inspire you with a few creative ideas of your own :)


Dusted Gradient: makeupsavvy.co.uk
Colliding Stripes: kelsiesnailfiles.com
Brush Strokes: Algae Veronica Nail Designer
Map Transfer: Pinterest
Black Lace: theillustratednail.tumblr.com
Batman Nails: notanothernailblog
Black Matte and Gold Sparkle: garotasestupidas.com
Neon Stripe Zebra Nails: Beautylish.com
Guitar Hero: thenailasaurus.com
Balloons: holymanicures.blogspot.co.uk
Notes: kelsiesnailfiles.com
Minions: Pinterest

EKG:  Instagram, Buzzfeed, Pinterest
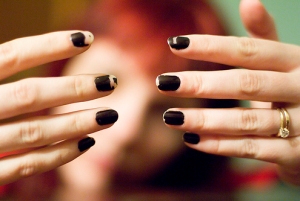
French with Black: chloesnails.blogspot.com
(Marbled Nails: RenewedStyle.blogspost.com)
Sources:
http://chloesnails.blogspot.com/2010/12/opi-ds-extravagance-funky-french.html
http://www.thenailasaurus.com/2012/06/guitar-hero-nail-art-20.html
http://notanothernailblog.blogspot.com/search?q=batman
http://theillustratednail.tumblr.com/
http://nailartgallery.nailsmag.com/algaeveronica/photo/281135/simple-abstract/tag/25775
http://www.kelsiesnailfiles.com/2012/05/day-7-black-and-white-nails.html
http://www.kelsiesnailfiles.com/2012/11/two-bottles-o-polish-infinite.html
http://www.makeupsavvy.co.uk/2010/11/dazzle-dust-nail-tutorial.html
http://holymanicures.blogspot.co.uk/2012/03/colorful-balloon-nails.html

Wednesday, October 24, 2012

How to "Nail it!"

This post is going to be all about nails.  How they can be one of your best beauty assets and how you can make the most of your manicure.

In the October 2012 issue of O: The Oprah Magazine there is a lot of fun advice about love, life, careers and beauty.  One piece of advice that stuck with me was from O's creative director Adam Glassman.  When asked for "Simple Ways to Look Polished," Glassman's response was: "a great haircut, neat nails, and well-shaped eyebrows."  These are truly beauty basics.

Lately, it has really hit me that my nails looking great can really have a positive impact on my day.  It might sound silly, but it is true.  You can see your nails throughout the day, if they look great it helps you feel that you look great.  If they're kinda messy and unkempt, it may make you feel messy and unkempt.

But what's more frustrating than spending the time to make your nails look great only to have them chip a few days later?  Well I'm sure there are a lot of more frustrating things, but it is definitely frustrating.  I'm a nurse, and I have found that changing gloves all day, washing your hands all day, opening pill packets, etc., is not at all friendly to nails and nail polish.  So today I went in search of the best ways to keep your manicure going strong.

chipped-nail-polish-manicure
(Image from Flickr)

To make a manicure last longer:


Clip/File:  shorter nails are less likely to chip, so shorter is better.  Shape also matters, but I have read conflicting advice on what shape to use.  Self.com says to file nails short and round and to avoid square corners as this leads to more chips.  Good Housekeeping on the other hand says round your tips and leave corners somewhat square.  Both magazines got their advice from dermatologists.  I recommend trying both ways and see what works for you.  So far, for me, it looks like rounded edges work better.

(Image from Fashion meets Food)

Good Housekeeping also recommends filing over clipping.  All sources I found agree that filing is good but needs to be done in only one direction.  This is really trickY for me, so I just resorted to mainly clipping and then just finishing up edges with a bit of one direction filing.

Get rid of oils:  The great thing about having to remove old nail polish is that you will have already removed any oils with your polish remover.  Otherwise use either nail polish remover lightly over each nail or soap and water to make sure your nails are clean and oil free.

Don't soak:  Make sure nails are dry before you paint them.  Nails that have been soaked have soaked up water and will shrink as your polish is drying, this can lead to chips and bubbling.

Base coat:  Yes, this is important.  Base coats adhere to your nails better than nail polish and help hold your manicure to your nail to keep it from chipping.

Polish in layers:  After the base coat you need to apply your color in multiple thin layers rather than a single thick one. This will help prevent chipping due to one thick brittle layer.  With each layer make sure you completely cover the end of your nail.  Sealing this end with each layer and the top coat helps to prevent chipping.  The polish you choose also plays a role in how long your manicure will last.  Make sure each layer is completely dry before adding more polish, luckily thinner layers dry faster.  Another thing that will help your polish last longer is picking the right shade.  Shiny shades last longer than matte ones and shimmery or glittery shades also last longer.

Top Coat:  Choose a good clear top coat to seal everything in.  Wait until your polish has dried before applying it.  Make sure you completely seal the polish in with the top coat, once again make sure you get the end.

Leave them:  Let your nails dry without blowing on them.  Air going over the polish can cause bubbles which will lead to chipping.

Maintenance:  Once your polish is completely dry apply a little oil to each cuticle.  Any oil works, they do make specific cuticle oil if you want to buy it, but you can use your cooking oil from the kitchen.  Keep this up while your nails are painted.  It keeps the nails healthy and makes them less likely to chip.  Also to keep your polish from wearing off or chipping you can apply another top coat daily.  It's a whole lot quicker than having to re-do your nails in a few days and definitely helps them last.


Yay for longer lasting nails!!

Sources: 

Self:  http://www.self.com/beauty/2011/11/pump-up-your-beauty-routine-slideshow?mbid=enws_bty0925#slide=7
Redbook:  http://www.redbookmag.com/beauty-fashion/tips-advice/manicure-tools-and-treatments#last-slide
Good Housekeeping:  http://www.goodhousekeeping.com/beauty/nail-care/long-lasting-manicure-jul03_2
http://jezebel.com/5838802/how-to-make-a-manicure-last
http://www.collegefashion.net/beauty-and-hair/3-ways-to-maintain-your-manicure-make-it-last/
Images:
http://www.fashionmeetsfood.com/2011_05_01_archive.html
http://www.healthcare9.com/2012/04/manicure-tips-make-nail-color-last-longer/

Tuesday, September 25, 2012

New Hair Cut!

I have always wanted to have super-long, almost rapunzel long hair.  I therefore always have a hard time getting it cut.  I like to just get trims, but sometimes it doesn't get all of the damaged ends off.  I finally broke down this week and actually got it cut. Not trimmed but cut.  We're talking about 5-6 inches here.

Before:


My inspiration:

The lovely Nina Dobrev.


The Cut!


My printer was out of ink, so instead of taking a picture in with me, I had to try to explain what I thought the cut consisted of.  I think I did pretty good, for being a girl who never went to cosmetology school.


Gorgeous Glowing Cheeks (just $9)

Want to look healthy?  Happy?  Glowing and Gorgeous?  Who doesn't?

The best way to make yourself look healthy, happy, glowing and gorgeous is with beautiful blush and bronzer and a happy smile :)

I am really, really loving the products I have been using on my cheeks lately.  They are also super cheap!

The products:

1.  e.l.f. Complexion Brush, $3
2.  e.l.f. Baked Bronzer in St. Lucia, $3
3.  e.l.f. Baked Blush in Rich Rose, $3

First I apply foundation or tinted moisturizer and a translucent powder to set my foundation.  I then take my brush and my bronzer and swipe it around it a few times and apply just below my cheek bones.  I like to look where the shadows from my cheekbones form or where they would form and then just fill in those shadows with some bronzer.  

I start about here and then continue to here.  (see picture below :) )

(Bronzer from 1 to 2)
I like this shade of bronzer because it is fairly safe and not orangey.  Put on just enough bronzer to accentuate those shadows under your cheek bones and then stop.  Now swipe your brush a few times on a clean towel or something to get rid of the rest of the bronzer.

Model applying blushSwipe your brush a few times around on your blush.  Start applying the blush directly below your pupil on your cheekbone.  Tip!  It is super easy to apply the blush to your cheek bones if you suck your cheeks in to make like a fish/kissy face.  You then have very exposed cheekbones to follow.  See the example on the right?  I like the face example but not where she's applying the blush.

Start here and blend lightly all the way up into your temple and hairline.  (see picture below :) )

(Blush from 1 to 2)
I do each of my cheeks evenly by applying a few layers to each.  I then take what is left on my brush and swipe it along the top of my brows and down my nose.  This extends the glow to your whole face :)

Finish with eye makeup and then your lips.  Another Tip!  If you plan to do a bold lip, always do it before your blush.  That way you can keep the blush subtle enough to not clash with your bold lip.  I did a more natural but darkish lip color with this cheek look.


All done!


Saturday, September 22, 2012

V.S. Fashion Show 2012


That's right!  Victoria's Secret has now announced the date and time of their annual fashion show.  I know that not everyone likes the fashion show.  A lot of people see it as scandalous and believe it makes women feel that they need to be a certain size and shape.  I used to judge the show that way too.  I was curious though and really thought the costumes and designs were amazing, so I started watching it a few years ago and now I love it!

Last year I realized that watching the show can give you a sneak peak of beauty and hair trends long before they are mainstream.  Awesome!  Last year for example, the models all had gorgeous natural ombre hair.  This was long before the trend was seen on pinterest or magazines.

Here's five reasons why I am so excited to watch this year! (all just spur of the moment, off the top of my head)


1.  New beauty and hair trends.

2.  Amazingly artistic costumes and wings.

3.  It's like a series of awesome mini concerts.

4.  Awesome and fun runway show.

5.  Great inspiration to keep working out at the gym.

Tuesday, September 18, 2012

Beauty Blogger Get to Know Me Tag


1. Is your hair naturally curly or straight?
Very, very straight.

2. What is your natural hair color?
Medium to dark brown.

3. Do you dye it yourself or go to a salon?
I don't color it very often, but I have done both.

4. How often do you wash your hair?
Every day, otherwise it gets greasy :(

5. Do you wear the same style every day or change it?
I pretty much wear it in a bun everyday.

6. Do you do your own mani/pedi or go to a salon?
I've never had a mani/pedi done by a salon.  I always do it myself, my sister has done gel "glitter toes" for me once.

7. How often do you change your nail polish?
When I paint my nails I usually have to repaint them every 3 days because they chip so much from work.

8. Do you polish your toes in the winter or just in the summer?
I try to always have them polished.

9.  How long does it take you to put on your makeup?
I think about 20 minutes.

10. What do you do first, face or eyes?
I always do my face first.

11. Do you "collect" makeup or just buy what you  need when you need it?
I only buy what I need or what I think I need.

12. How often do you wear false eyelashes?
I've only worn them for my engagement pictures and for my wedding.

13. Do you do a full face of makeup everyday?
Nope.

14. Do you wear makeup when you are home alone, or with family?
Yeah, some of the time.

 15. Will you leave the house without makeup?
Yep.

16. How many high end products do you have?
None right now :)

17. How often do you wash your makeup brushes?
Not very often.

18. Do you plan your OOTD every night or decide when you are getting dressed?
It depends on how early I have to get up in the morning.  I'm not a morning person, so if I know I need to get up and get going I will lay it out the night before.

19. How often do you change your handbag?
Not very often.  Usually only when I get a new one. So I guess seasonally.

20. What time do you get up and go to sleep?
It depends on the day.  I try to go to bed around 10:30 and I get up at 6:30 when I work and sleep in until about  8:30 when I don't.

21. How often or when do you work out?
Lately about 3x's a week.

22. Left-handed or right-handed?
Right-handed.

23. How tall are you?
I'm 5'9"

24. Do you speak a foreign language?
Not really.  I can understand Spanish, but when I try to speak it I sound like an idiot.

25. How many pets do you have?
None right now. 

 26. How often are you on blogger?
I look at other people's blogs through pinterest daily and am on youtube daily.  I really only use blogger to make my own posts.

27. Do you read the comments posted on blogs?
It depends on the post.

28. Do you keep a list of products to try as you see other posts?
More of a mental list.

29.  How did you come up with your blog name?
I knew I wanted it to be a beauty blog and knew that it should have something to do with my passion for bargains and D.I.Y. stuff.

30. What kind of camera do you use for photographs?
Just our family camera, it's a Nikon point and shoot.

31. How often do you clean your house?
I clean parts of it everyday that I am off.  My husband and I work together with our schedules to clean it when it needs it.

32. What is your favourite colour?
Lime green.

33. Do you swear?
Not usually.

35. What are you doing with the rest of your day?
Homework, dinner, gym, and hopefully some more blogging :)

The 5 Fabulous Lip Trends of Fall


InStyle's September issue they showed 5 lip color trends for fall.  They are amazing!  The trick is finding the right shade for your skin color.  Here's some great examples modeled by some celebs:

The Nude Lip, a continuing trend.
Here's a great example from Angelina.  Like I already said, this is a continuing trend that has already been trending for the past few years.  It is still going strong, though, and is especially great if you do a smokey eye and want to keep your look less overwhelming.


Check out this article from InStyle magazine on how to find your perfect nude shade:      http://www.instyle.com/instyle/package/general/photos/0,,20337040_20416247_20835071,00.html


The Bright Pink Lip!

This trend is more new and more edgy than the nude lip.  I love this picture of Emma Stone rocking a bright pink lip.  She always looks gorgeous.  I've noticed that she almost always does something amazing with her lip color too.


This look can be more playful or more formal depending on how you do the rest of your make-up and also your hair style. This look is obviously more formal with the eyeliner and eye make-up, jewelry, and up-do.


Here's the link to an awesome post by College Fashion on how to achieve a great look with a hot pink lip:
http://www.collegefashion.net/beauty-and-hair/how-to-wear-hot-pink-lipstick/


Another continuing trend is the coral lip.

This amazingly gorgeous pic is of Kate Bosworth wearing a coral lip and more natural make-up.  This trend started in the spring and is still going strong heading into fall.


A newer trend is the Red Lip.

Celebs have been wearing red lipstick a lot lately.  It is stunning!  Here is Miranda Kerr looking amazing with cherry red lips.

This trend is not brand new for fall, but is still red hot.


Check out this article from InStyle to see which shade works best for your skin tone and hair color:        http://www.instyle.com/instyle/package/general/photos/0,,20337040_20319008_20703115,00.html


Last we have my personal favorite...the Burgundy Lip!

This look I feel is the newest and most appropriate for fall.  Also it looks amazing on any skin tone with the right shade.  Here we have Mischa Barton wearing a gorgeous burgundy shade.  I feel like this picture just says fall, from the hat to the healthy smooth hair, to the healthy skin, less eye make-up, and finally to the burgundy lip.


Here's an article from allure on finding the right shade of burgundy:      http://www.allure.com/makeup-looks/2011/how-to-choose-and-wear-the-right-lipstick#slide=5


Tuesday, August 14, 2012

11 Quick Beauty Tips and Tricks

1.  To get stick straight eye lashes to curl instead of sticking straight forward, use an eye lash curler and a blow dryer.  Yep that's right, a blow dryer.  Use the blow dryer on medium or high heat, and a low speed setting to warm up your eye lash curler, before you use it on your lashes make sure it's not too hot, by running your finger along the curved plate.  Use it to curl your eye lashes and then apply mascara.  Do this one eye at a time so that the lashes are still warm and curled while you apply the mascara.  The heat holds the curl.  Also if you use water-proof mascara it will last better and a mascara with a curved brush also helps.  Follow these steps and your stick straight lashes will stay curly all day.  Wahoo!

2.  If you want to have less coverage and wish you had a tinted moisturizer, just mix some of your liquid foundation with your moisturizer.  This works better with certain foundations and moisturizers.  It works great if you have a simple moisturizer (like Olay Complete Moisturizer) and a smooth liquid foundation.  I have been doing this for years and love it.  I actually rarely apply liquid foundation without first mixing lotion into it on my hand.

3.  If your armpits get irritated from wearing deodorant and shaving, apply a little bit of lotion to your armpits each time you get out of the shower and then after a bit put on deodorant.

4.  If you don't have any highlighter, you can use light eye shadow.  Use the lightest color in a compact or if you have mineral eye shadow your lightest color.  Make sure you blend it well and don't use too much and it works just fine.

5.  If your skin is getting a bit dry and flaky, get some plain yogurt and sugar.  While you are in the shower mix the sugar and the yogurt and lightly scrub your face with it, then rinse.  It moisturizes, gets rid of the flakes and nourishes your skin.  You only need a few spoonfuls of each and don't mix them before you get in the shower because the sugar will dissolve and it will not scrub.  Also, of course, make sure you are using a daily moisturizer.

6.  If you want your lips to pop, use just a bit of highlighter along the top of your cupid's bow.  I got this one from SELF Beauty Quick Tip's in my e-mail.  Here's what they said about it, "it gives an Angelina-like illusion."  After trying it I definitely have to agree.

7.  Tired of trying to keep finger nail or toe nail clippings from going all over the place?  Clip them outside.  If you trim sitting on the edge of your lawn you don't have to worry about clean up.

8.  Get a great pair of flats for summer.  On days that your toes really need to be touched up but you don't have the time, wear the flats in place of flip flops.  They cover your less than perfect toes and you still look great.

9.  Get a great eye look update, just by changing the color of your eye liner.  Dark Plum, or dark purple eye liner looks amazing on every eye color.  It is in many ways more subtle than black, but is very flattering.

10.  To add moisture to your lips, apply a thick coat of lip balm before you hop in the shower,  the humidity and heat will help the balm soak into your lips and moisturize them.  To finish, gently exfoliate the lip gloss and dead skin cells away with a damp wash cloth (SELF Beauty Quick Tip).

11.  To quickly add volume to your hair, simply part it differently than you usually do.  When you part your hair in the same place most of the time, it makes your hair lay much flatter.  When you change the part the hair is automatically fuller looking.
 <  Tip numero uno for eye lashes

 < tip 8 for cute summer feet
              Tip number two, instant tinted moisturizer  >